


How to use an air fryer a step-by-step guide for beginners
Modern kitchens have embraced a compact revolution in countertop cooking: the air fryer. This appliance transforms hot air circulation into golden, crisp textures while drastically reducing oil use. For urban professionals balancing tight schedules, for families seeking healthier weeknight dinners, and for culinary explorers curious about new air frying techniques, understanding the appliance’s behavior is essential. This piece presents a practical, descriptive roadmap for how to use an air fryer with confidence, from unboxing to troubleshooting. It anchors the journey in a recurring character—Maya, a busy project manager who wants to shave minutes off dinner prep while keeping meals nutritious and appealing—so each step becomes tangible rather than abstract. Expect detailed setup checks, safety protocols, precise temperature recommendations, and creative easy recipes suitable for beginners. Each section illuminates a distinct facet of air frying: mechanical principles, a step-by-step starter routine, advanced tips for achieving crunch, time-saving recipe strategies, and maintenance essentials. Practical examples, a cooking timetable table, and real-world scenarios will enable immediate experimentation. For those who want to dig deeper into model-specific advice or community-tested techniques, authoritative resources and curated guides are woven into the narrative to support progressive learning.
- What to expect: Crisp results with little oil, quicker cook times than an oven, and minimal cleanup.
- First steps: Clean removable parts, run an initial dry cycle, and preheat when recipes require it.
- Best practices: Single layer cooking, occasional shaking or flipping, and light oil mists for extra crunch.
- Versatility: Roast, bake, reheat, dehydrate, and broil with one compact unit.
- Maintenance: Regular washing of baskets, wiping the heating element area, and checking seals.
Understanding an Air Fryer: How It Works, Types, and Key Components for Beginners
An air fryer operates as a high-speed convection cooker: a heating element and a powerful fan circulate hot air around the food, producing Maillard browning and crisp textures without deep-frying. This basic principle translates to a range of functions commonly labeled on modern kitchen appliances as air fry, roast, bake, broil, and dehydrate. Typical operating temperatures stretch from about 180°F to 400°F, offering wide flexibility from delicate baking to the high-heat searing of proteins.
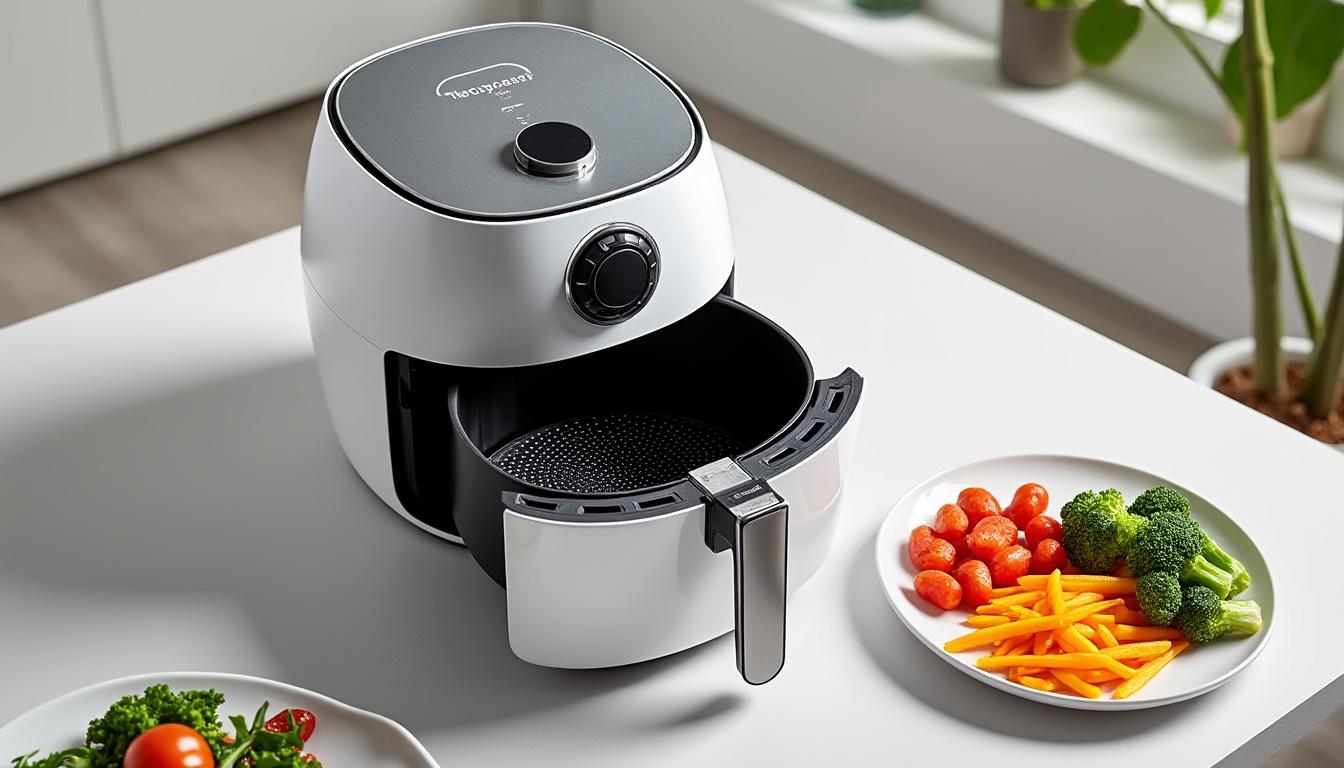
Two principal designs dominate the market: the basket-style model and the air fryer oven. Basket units feature a pull-out drawer and a perforated basket that allows unrestricted air circulation. These are compact and excel for single-layer batches of fries, wings, or vegetables. Air fryer ovens resemble countertop toaster ovens with racks and more interior volume, providing multi-rack capabilities and often more advanced presets. Choosing between them depends on household needs: a single cook or couple may prefer the basket’s footprint, while families or meal-preppers might find an oven-style unit more time-saving.
Key components to recognize are straightforward yet crucial. The heating element produces radiant heat; the fan sits directly above it to force convective flow; a basket or tray holds the food; and the control interface—buttons, dials, or touch panels—sets temperature and time. Some models include additional features like preheat functions, internal lighting, rotisserie attachments, and leaf-sensor presets. Knowing where the air vent and exhaust are located is important for safe placement, as blocked vents can affect performance and raise safety concerns.
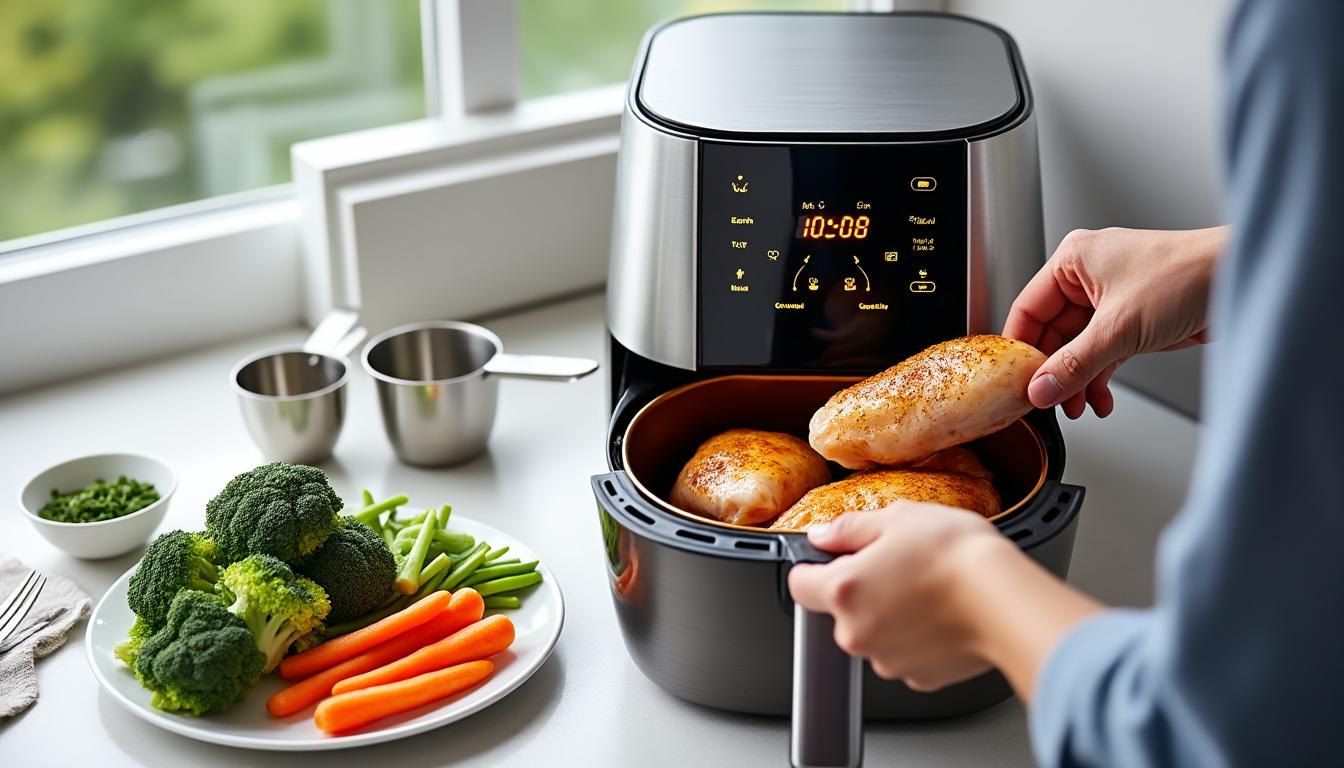
Consider a practical vignette: Maya receives a new basket-style air fryer and places it on a heat-resistant counter with three inches of clearance behind the unit. She examines the manual to identify the heating element and fan, then removes stickers and packaging. By visualizing how air moves—hot air down and around food through the perforated basket—Maya intuitively understands why overcrowding leads to limp textures. This mental model will influence how she portions food and designs recipes.
Several safety and operational behaviors follow from this understanding. Never submerge the main electrical housing. Always use oven-safe tools; avoid abrasive scrubbers on non-stick surfaces. Be mindful of oil smoke points when crisping fatty foods like bacon; excessive heat can cause smoking. These considerations improve both lifespan and performance.
For those eager to explore the technical background further, recommended reading expands on airflow dynamics and design comparisons; resources exist that explain “how an air fryer works” in more granular detail. Recognizing the components and airflow patterns of an air fryer enables purposeful experimentation and sets the stage for confident how to use methods tailored to varied recipes. Final insight: grasping the appliance’s mechanics transforms trial-and-error into reliable technique.
Step-by-Step Guide to First Use and Everyday Operation for Beginners
Preparing the air fryer for reliable service begins before the first recipe. Start by unboxing on a flat, heat-resistant surface and removing all packaging materials. Wash the removable basket and tray in warm, soapy water and dry thoroughly. Many manufacturers advise a first dry run—set the air fryer to 400°F for 10–15 minutes to burn off manufacturing residues and odors. This initial step is simple yet important for safe, odor-free cooking.
Next, follow a clear operational sequence every time food is cooked. The following step-by-step routine is optimized for new users learning air frying techniques:
- Place the appliance with adequate ventilation space around it and plug it in.
- Preheat the unit if the recipe or manual recommends it (typically 3–5 minutes).
- Pat food dry with paper towels to remove surface moisture for better crisping.
- Lightly coat items with oil using a spray or brush; most dishes require only a teaspoon or less.
- Arrange food in a single layer without overcrowding to ensure free air circulation.
- Set temperature and time according to the recipe, starting with manufacturer or community-tested guidelines.
- Shake, flip, or rotate the food halfway through the cycle for even browning.
- Check doneness with a thermometer for proteins; internal temperature guidelines ensure safety.
- Let food rest briefly after cooking to maximize crisp texture and even internal temperature.
This systematic approach reduces guesswork and minimizes undercooked or uneven outcomes. Preheating, in particular, matters when golden crust formation is desired. Most recipes call for preheating 3–5 minutes at the cooking temperature. However, in certain situations—like roasting vegetables that brown too fast—it may be advantageous to begin in a cold fryer to allow centers to cook before edges over-brown.
Practical temperature-and-time references accelerate learning. The following table offers starter values commonly used by home cooks. Use it as a baseline and adjust based on the model and portion size.
| Food Type | Temperature (°F) | Typical Time |
|---|---|---|
| Frozen French Fries | 400°F | 12–20 minutes, shake halfway |
| Chicken Wings | 380°F | 20–25 minutes, flip halfway |
| Vegetables (evenly chopped) | 375°F | 10–15 minutes, shake halfway |
| Salmon Fillet | 375°F | 8–12 minutes, depends on thickness |
| Muffins (small silicone cups) | 320°F | 10–15 minutes, toothpick test |
Seasoning and marination strategies also influence results. For breaded foods, use a light egg wash or a thin coating of oil so crumbs crisp rather than detach. For lean proteins, a brief oil rub helps heat transfer and crust formation while keeping interiors moist. When reheating leftovers, lower the temperature by about 30°F compared to original cooking temperature to avoid over-browning while restoring texture.
Model-specific presets can be convenient for novices, but manual temperature-and-time control grants the most consistent outcomes. For expanded checklists and alternative methods, refer to community guides that break down first-time routines and common pitfalls. Exploring those references offers a broader perspective on the initial learning curve and accelerates mastery.
Final insight: a disciplined, stepwise routine converts the first uses into familiar practice and builds a foundation for creative experimentation.
Advanced Air Frying Techniques and Practical Cooking Tips
Once the basics are understood, mastering a set of nuanced techniques yields restaurant-quality results. Core tactics revolve around airflow, moisture control, and timing. For example, moisture is the enemy of crispness. Pat foods dry before oil and seasoning, and avoid heavy wet batters that may fail to set properly under direct hot air. Instead, use thin, dry coatings or panko crumbs for crunchy exteriors.
Turning and shaking are deceptively simple but powerful. Small pieces like fries, diced potatoes, or Brussels sprouts benefit from a vigorous toss at the halfway mark. Larger cuts—chicken breasts, pork chops, or salmon—should be flipped to ensure both sides receive consistent browning. These maneuvers optimize exposure to the convective current and prevent shaded areas that cook more slowly.
Manipulating temperature for texture outcomes is an advanced lever. A short, high-temperature finish (e.g., raising by 25–30°F for the final 2–3 minutes) can intensify surface browning without overcooking interiors. Conversely, lower-temperature, longer-duration cooks are ideal for thicker proteins to allow heat penetration before the exterior darkens. Using a probe thermometer brings precision to these choices: pull chicken at 160–162°F and let carryover bring it to 165°F; aim for 125–135°F for medium-rare steak, depending on thickness and preference.
Accessory selection expands possibilities. Perforated parchment paper stabilizes delicate items and reduces cleanup, while silicone pans transform the basket into a baking environment for small cakes or gratins. Rotisserie spits, skewer racks, and multi-level trays increase capacity and versatility. Always verify accessory safety with the manufacturer’s guidance.
Practical cooking tips that separate beginners from confident cooks include:
- Do not overcrowd the basket: single layers promote crispness.
- Use minimal oil: a teaspoon or a light spray creates crispness without greasiness.
- Adjust oven-to-air-fryer temps: reduce conventional oven temperatures by about 25°F as a baseline.
- Test doneness with a thermometer: improves safety and prevents drying out.
- Experiment with timing: smaller pieces cook faster; note tweaks for subsequent batches.
Reheating is another area where the air fryer outperforms microwaves, preserving texture and flavor. For pizza, preheat to 350°F and reheat for 3–6 minutes. For fries, similar temperatures restore crispness in 3–5 minutes. Remember to reheat in single layers for even results. For sticky or delicate items, consider using a small sheet of perforated parchment to keep them intact while allowing airflow.
Real-world experimentation accelerates progress. In the case of Maya, balancing weekday dinners with limited time, she learned to batch-roast potatoes at 375°F while finishing a salmon fillet at 400°F for a final crisp. Staggering items and relying on carryover heat allowed both components to be served together while preserving textures. That kind of scheduling turns the air fryer into a true time saving ally.
Final insight: mastering these techniques turns the air fryer from a novelty into a precision tool for dependable, crisp, flavorful meals.
Easy Recipes, Accessories, and Time-Saving Meal Strategies
For beginners seeking approachable projects, the air fryer excels with straightforward, forgiving recipes that highlight its advantages. Appetizers and snacks—like chicken tenders, shrimp, or sweet potato fries—require minimal steps and provide rapid gratification. Proteins such as chicken breasts, pork chops, or salmon cook quickly and stay moist when cooked at moderate temperatures with a brief rest period.
Here are several easy recipe frameworks that scale for families and weeknight schedules:
- Simple Crispy Chicken Tenders: coat in seasoned panko, mist with oil, air fry at 400°F for 8–10 minutes, flip halfway.
- Roasted Vegetables: toss broccoli or Brussels sprouts in oil and garlic, air fry at 375°F for 10–15 minutes, shake at 7 minutes.
- Salmon Fillet: brush with oil, salt, pepper and a glaze, air fry at 375°F for 8–12 minutes depending on thickness.
- Baked Potatoes: rub with oil and salt, air fry at 400°F for 35–45 minutes, turning once.
- Quick Muffins: pour batter into silicone molds, air fry at 320°F for 10–15 minutes, test with a toothpick.
Meal-prep strategies amplify the air fryer’s appeal. Roast a large tray of seasoned vegetables and portion them for lunches, or cook multiple proteins sequentially while using the resting windows to reheat and finish other components. Using an oven-style air fryer, racks can be staggered with different items, freeing the cook from single-basket limits.
Accessory advice: invest in a set of silicone pans and a perforated parchment roll. These reduce cleanup and enable baking. A small oil mister helps apply minimal oil evenly. For fans of crisp coatings, a light coating of oil on crumbed surfaces yields superior browning compared to dry crumbs alone.
Recipes and community-tested methods continue to evolve; curated resources provide structured recipe collections and troubleshooting. For a curated stepwise discussion of beginner-friendly workflows and tested recipes, consult guides that focus on how to use the appliance in practical, recipe-driven contexts. These references support iterative learning and expand inspiration for both savory and sweet applications.
To maintain variety, rotate between quick snacks and composed meals, and use the air fryer as a complement to other appliances. For instance, roast vegetables in the air fryer while finishing grains on the stovetop and dressing salads. This orchestration yields balanced meals with minimal active time.
Final insight: using the air fryer as the centerpiece of a meal-prep strategy transforms it into a reliable, time-saving partner for routine healthy cooking.
Cleaning, Maintenance, Troubleshooting, and Choosing the Right Air Fryer
Regular cleaning and informed troubleshooting extend the life of the appliance and sustain performance. Most basket and tray components feature non-stick coatings. The recommended routine is to remove and wash them in warm, soapy water after each use. For stuck-on residues, soak the basket in hot water for 10–15 minutes before washing to protect coatings. While many parts are labeled dishwasher-safe, hand washing preserves finish and reduces wear.
Interior wipes are simple: after unplugging and cooling, use a soft damp cloth to remove crumbs and grease from the base. Check and clean the heating element with a soft brush if grease or debris accumulates. Never submerge the main electrical housing.
Troubleshooting common issues is mostly procedural. If smoke appears during cooking, lower the temperature, drain excess fat, and ensure no residual oil is on the heating element. For stuck-on odors after cooking fatty foods, run an empty cycle with lemon slices or a tablespoon of vinegar at 375°F for 5–10 minutes to neutralize odors. If food cooks unevenly, avoid overcrowding, and confirm that the basket is seated correctly so airflow is unimpeded.
Choosing the right model depends on capacity, feature set, and space. Basket units are ideal for compact kitchens and fast single-batch snacks. Air fryer ovens offer multi-rack capacity and advanced functionality for larger households. Consider features such as preset programs, rotisserie attachments, digital controls, and cleaning conveniences. Capacity guidance suggests a 3–5 quart basket for singles or couples, and 6–10 quart or oven-style units for families.
Brand reliability shifts over time. For a structured comparison of trusted options and features, consult up-to-date roundups that evaluate reliability, warranty coverage, and user feedback. These comparisons often list features to prioritize and provide context for what size and brand will best match lifestyle patterns in 2026. Informed shoppers weigh capacity against countertop space to avoid acquiring an appliance that becomes a storage problem.
Maintenance checklist:
- Wash baskets after each use and dry thoroughly.
- Wipe the interior and exterior weekly to avoid grease buildup.
- Inspect heating element monthly for residue and clean gently if necessary.
- Store accessories together to prevent loss and speed future use.
- Follow manufacturer recommendations for part replacement or professional servicing.
For stepwise selection advice and expanded comparisons on capacity and features, curated articles offer detailed buying frameworks and reliability reports. These resources help decode marketing claims and align choices with real-world usage patterns.
Final insight: conscientious cleaning and informed selection convert the air fryer into a durable, consistent tool that supports everyday healthy cooking and efficient kitchen workflows.
{“@context”:”https://schema.org”,”@type”:”FAQPage”,”mainEntity”:[{“@type”:”Question”,”name”:”What are the ideal preheat times for most air fryer recipes?”,”acceptedAnswer”:{“@type”:”Answer”,”text”:”Preheat for 3u20135 minutes at the cooking temperature for most recipes. Some recipes benefit from starting in a cold air fryer, such as vegetables that brown quickly on edges; always follow the specific recipe guidance and adjust as needed.”}},{“@type”:”Question”,”name”:”Can frozen foods be cooked directly in the air fryer?”,”acceptedAnswer”:{“@type”:”Answer”,”text”:”Yes. Frozen fries, nuggets, and similar items cook well at higher temperatures (around 400u00b0F) and usually need 10u201320 minutes depending on size. Shake or turn halfway for even browning and consult package or community-tested times for best results.”}},{“@type”:”Question”,”name”:”How to prevent smoke when air frying bacon or fatty foods?”,”acceptedAnswer”:{“@type”:”Answer”,”text”:”Lower the temperature to below the smoke point of rendered fats (for bacon, around 350u00b0F). Drain excess fat midway through cooking and clean the heating element and basket regularly to avoid buildup.”}},{“@type”:”Question”,”name”:”What accessories are worth buying for beginners?”,”acceptedAnswer”:{“@type”:”Answer”,”text”:”Perforated parchment sheets, silicone baking cups, a small oil mister, and a compact set of oven-safe pans expand functionality. Ensure all accessories are labeled oven or air fryer safe.”}}]}What are the ideal preheat times for most air fryer recipes?
Preheat for 3–5 minutes at the cooking temperature for most recipes. Some recipes benefit from starting in a cold air fryer, such as vegetables that brown quickly on edges; always follow the specific recipe guidance and adjust as needed.
Can frozen foods be cooked directly in the air fryer?
Yes. Frozen fries, nuggets, and similar items cook well at higher temperatures (around 400°F) and usually need 10–20 minutes depending on size. Shake or turn halfway for even browning and consult package or community-tested times for best results.
How to prevent smoke when air frying bacon or fatty foods?
Lower the temperature to below the smoke point of rendered fats (for bacon, around 350°F). Drain excess fat midway through cooking and clean the heating element and basket regularly to avoid buildup.
What accessories are worth buying for beginners?
Perforated parchment sheets, silicone baking cups, a small oil mister, and a compact set of oven-safe pans expand functionality. Ensure all accessories are labeled oven or air fryer safe.
Further reading and curated guides for expanding knowledge include accessible, practical resources on using an air fryer and selecting the right model for specific needs. For a comprehensive how-to primer aimed at first-timers, consult a trusted stepwise resource that combines setup and cooking basics. For comparative buying advice, discover detailed tests and capacity tips that help match appliance features to household routines.
Suggested further reading: a first-timer’s practical guide and a focused how-to resource that outlines common beginner mistakes and solutions found at a practical use guide. For technical explanations and brand-selection frameworks, explore the detailed discussions on airflow and model choices available at air fryer technology explained and how to choose the best air fryer.